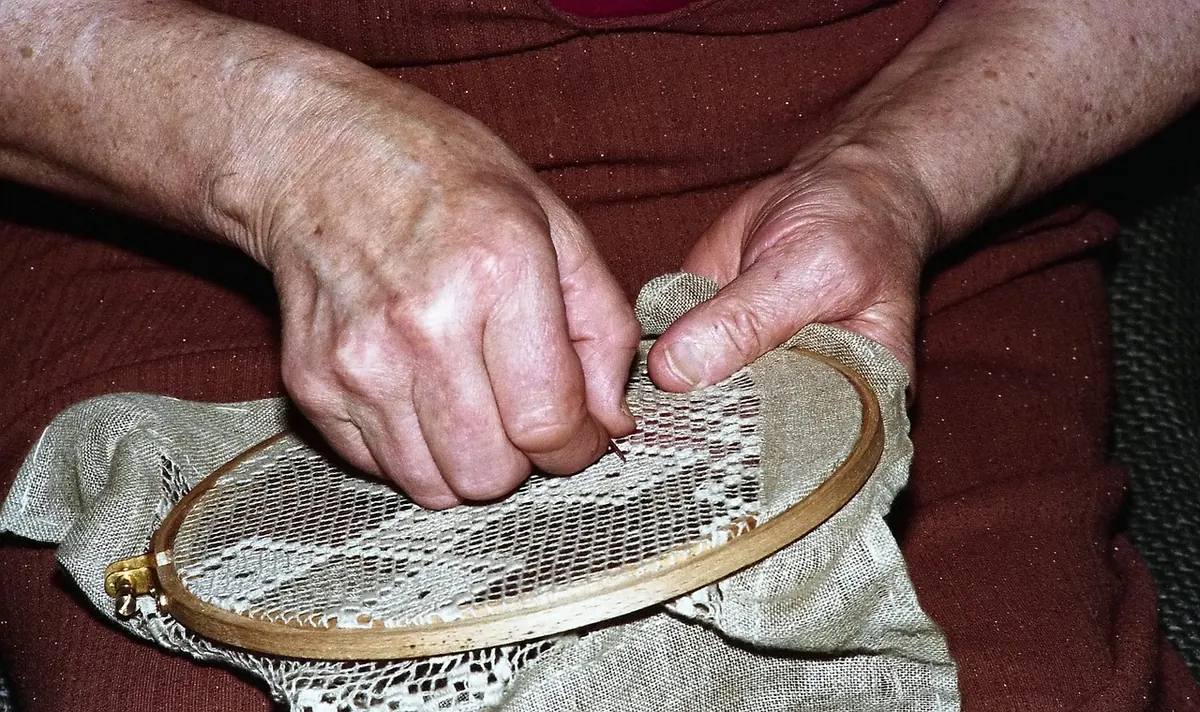
Hand embroidery is forgiving in many ways — a slightly wobbly line can disappear into the overall design. But some habits show up in every piece: puckered fabric, lumps beneath the surface, thread that fuzzes and snaps, stitches that sink into the weave. None of these are about talent. They come from a small set of technique choices, and each one can be adjusted the next time you pick up a needle.
The most common fault is pulling too hard. A stitch should sit on the fabric, not bite into it. When you tug the thread until it twangs, you drag the weave together and the fabric puckers around the stitching. On linen and loose-weave cotton this can be permanent — pressing helps, but the distortion rarely disappears completely.
The fix is simpler than it sounds: draw the thread through until the stitch lies flat against the fabric, then stop. Feel for the moment the thread stops moving smoothly and begins to resist. That resistance is the fabric telling you it has had enough.
One habit helps more than any other: after every few stitches, take the hoop off your lap, lay the work flat on the table and look at it straight on. Puckers you cannot see at an angle become obvious from above.
A knot at the end of your thread is convenient, but it creates a bump under the fabric. Under a thin cotton shirt or a piece being framed, that bump is visible. Knots also tangle when threads cross on the back and can work loose over time.
Where there is already stitching — a border, a filled leaf — anchor the new thread by running it under existing stitches on the back, then bring the needle up where you want to begin.
Finishing matters just as much. Run the thread under the backs of several stitches, change direction once so it locks itself, and trim. Long tails left dangling catch on the next thread and create tangles that seem to appear from nowhere.
Long threads are the quiet cause of most tangling. Anything much beyond 45cm has time to twist on itself, rub against the fabric and fray. Shorter lengths mean more re-threading, but fewer knots, less fuzz and cleaner stitches.
Separating strands matters too. With stranded cotton, take the strands one at a time from the full length rather than pulling two or three together. Pulling a bundle makes them snag and knot before you have even started.
Twist is easy to manage. Let the needle hang free every so often so the thread unwinds itself, and run your finger down it to smooth the strands. For satin stitch, a laying tool — even a spare needle held in your other hand — keeps the threads side by side instead of rolling over each other.
Fabric should be taut like a drum, not stretched like a canvas. Tap it with a finger: it should give a soft note and spring back. If the weave has visibly opened or the fabric has pulled out of shape, loosen the outer ring and start again.
Use a hoop comfortably larger than your design — small hoops are easy to hold but crush the stitches you have already worked. Avoid hooping over completed areas. On a large design, work in sections or move to a frame, repositioning as you go.
Hoop marks are worth thinking about before you begin. If you are working on linen or any fabric with a raised texture, take the work out of the hoop between sessions rather than leaving it stretched for weeks. Gentle steaming usually lifts the marks, but keeping the creases out is easier than removing them.
A needle that is too thick leaves holes along the line of stitching; one that is too fine shreds the thread as it passes through the eye. Choose the smallest needle that comfortably takes your thread and still passes through the fabric without dragging. Most surface embroidery uses crewel or embroidery needles; counted work on evenweave calls for a blunt tapestry needle.
Two smaller faults are worth watching:
Stitch length is the other quiet problem. For satin stitch, long-and-short shading and anything that should sit smoothly, draw faint guidelines first. A row that drifts in and out of alignment is far harder to correct afterwards than to prevent.
Before you settle down to stitch, run through this short check. It takes under a minute and saves a great deal of unpicking.
Hand embroidery improves through small corrections repeated often, not through one perfect technique. If a piece has already gone wrong, finish it anyway. Noticing where your tension slips and where the stitches begin to drift will serve you better than a flawless sampler — and the next piece will show what you learned.
Photo: MeHe / Pixabay

A practical ten-point checklist for planning craft room storage, from zoning by activity to clear containers,...

Sewing circles, guilds and workshops exist in most UK towns — you just need to know where to look. Here is how to...
Practical ways to fit a sewing room into a small UK flat, using folding furniture, clever layout and vertical...

Sewing thread storage, organization, and inspiration..
